Native American Projects for Each Grade (Grades 1–5)
The most important aspect of raising our children is teaching them respect. This respect is not just for the people around them, it is for every race, creed, religion, and political value. For centuries, Native Americans suffered through disrespect and have been massacred.
Because it has been going on for so long, it is difficult for us to realize when they this disrespect is occurring, even in everyday conversation. There are even groups of people who name their groups after Native American concepts when they have no affiliation with a Native American tribe. Sadly, they are not even aware that they are disrespecting an entire culture.
Some states have passed regulations enforcing schools to teach tribal history in schools. Unfortunately, there is nothing stated in a single state constitution mandating it, so schools can simply overlook this regulation. It has actually reached the point where in 2008, Denise Juneau, the first Native American Woman in the history of Montana to take a statewide office, the Montana superintendent of public instruction.
Because of the importance in teaching understanding for different cultures is important, we have developed a list of crafts elementary school students can complete to celebrate the lives of Native Americans across the United States.
Pre-Kindergarten – Making Masks
Children who are in preschool love doing crafts and exploring different cultures. This mask activity will allow children to create masks that Native Americans have used for storytelling for centuries.
Materials:
- White paper plates (pre-cut the eye holes)
- hot glue gun
- tongue depressor
- tempera paint
- glue
- paper scraps
- feathers
- strings
- beads
- ribbons
Directions
Have the children decorate their mask in a way that tells a Native American story. Make sure their mask represents the story of their choice.
Kindergarten - Pow Wow Drum
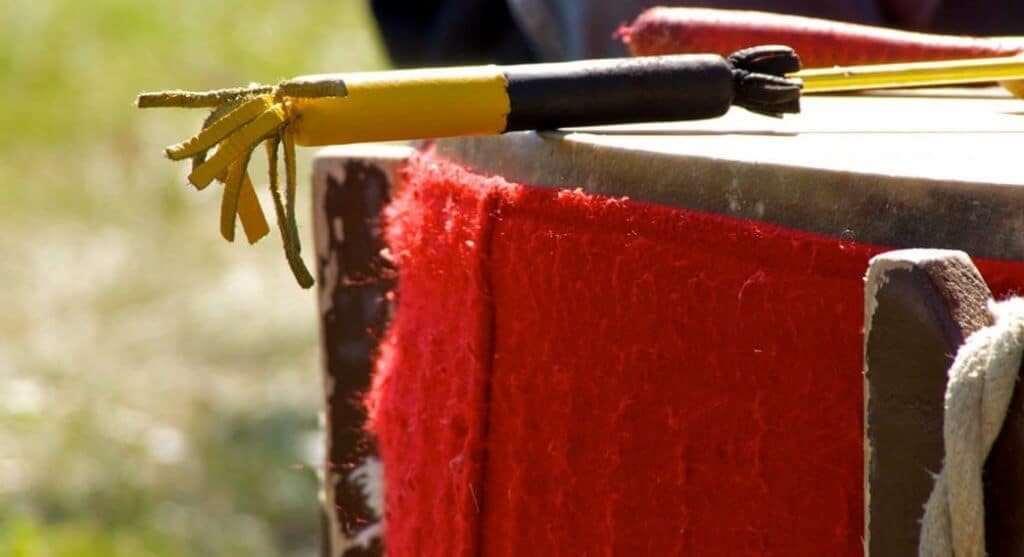
This is a great activity for kindergarten kids. They love making noise, and that is exactly what making a drum is all about.
Materials:
- Coffee can
- Glue
- Construction Paper
- Pre-cut foam shapes
Directions:
- Wrap the coffee can in any color construction paper and glue in place. Allow to dry.
2. Let kids decorate with the different pre-cut shapes, feathers, string, or anything else you have in your craft bucket.
3. Have the adult use hot glue to attach the lid to the coffee can. Allow to dry and you have a pow wow drum.
First Grade – Miniature Totem Pole
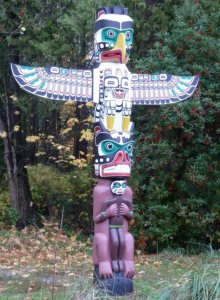 Totem poles had special meaning to Native American tribes. They were hand carved, poles with human faces and animal faces engraved in them.
Most Totem poles were made by tribes in the Pacific Northwest. The pole on the left is located in Vancouver.
The purpose of the Totem pole is to tell a story, outline a blood line, or tell a legend that was well known by the tribe.
Materials
- 4 or more wooden thread spools (thread removed)
- Wood glue
- Washable Markers
- Different colors of construction paper
- Scissors
Directions
- Glue your wooden spools on top of one another, to create a straight stack. Allow it to dry for several hours. If you chose to use different size spools, stack them with the largest spool on the bottom, and use smaller spools as you move up.
- While the glue is drying, read stories about Native American Totem poles.
- After the glue has dried, use the markers to draw pictures on each spool. Make sure the pictures tell a story, or describe an event.
- Cut a set of wings from your construction paper. Decorate the wings and glue them onto the back of your Totem pole.
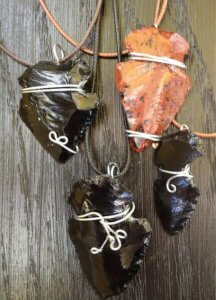
Second Grade – Sand Art Arrowhead Necklace
Native Americans are well-known for their ability to create arrowheads to hunt with. What better way to show our respect for their ability to survive naturally than to create sand art arrowhead necklaces?
Materials
- Colored sand for crafting
- Card stock paper, brown
- Multi-colored pony beads
- 3' of Jute (Necklace strap)
- Liquid school glue
- Pack of washable markers
- A hole punch
Directions
- Print out this pattern on the brown card stock paper. Cut the pattern out carefully.
2. Cover the entire arrowhead with a thin layer of liquid glue. Sprinkle colored craft sand over the area where the glue is. Let it sit for one minute. Shake off extra sand.
3. Sit your arrowhead to the side and allow it to dry.
4. Once your arrowhead is dry, use your markers to decorate the rest of your necklace.
5. Use a hole punch to create a hole at the top of the necklace. String a pattern of beads onto your 3' string of jute. Place the arrowhead piece on the necklace. Repeat the previous pattern backwards on the other side.
6. Tie a bead to each end of the jute with a tight knot.
Third Grade – Make a Native American Family
To celebrate the Native American family, why not make a Thanksgiving decoration for your table. This Native American family will make the perfect addition to your existing decorations.
Materials
- 2 or 3 cardboard paper towel tubes
- Skin-toned construction paper
- Multiple colors of construction paper
- Scissors
- Liquid glue
- 1 black marker
Directions
- Cut your cardboard tubes into different lengths. The lengths will represent the height of the people in the family, so make sure you have one tall enough to be the mom and another tall enough to be the dad.
2. Cover each of your tubes with construction paper that is skin-toned.
3. Use the other colors of construction paper to create clothing. Glue it onto your card board lengths.
4. Using brown and black colored construction paper, cut thin strips up the paper, stopping ¼ inch before you reach the top. Glue the hair onto your family.
5. Using construction paper, cut out headbands and small feathers. Glue the feathers to the headband. Glue the headband around each of your family member's heads.
6. Draw faces on your Native American family.
Fourth Grade – Painting Buffalo Hide
Native Americans used buffalo hide for may different things. One of the things they used it for frequently was painting canvas. You can create your own buffalo hide free buffalo hide paintings right now with just a few materials.
Materials
- Brown craft paper
- Pencils
- Erasers
- Crayons
- Tempera paint
- Paintbrush
Visit this website to learn more about Buffalo Hide Paintings
Directions
- Explore the website about Buffalo Hide Paintings.
2. Think of ideas that you would like to use. What story do you want to paint?
3. What symbols could you use to tell your story? Will others be able to read it with the symbols you have chosen?
4. Cut your brown craft paper into an 18 x 18 inch square. Fold your paper in half and tear the paper along the folded line.
5. Crumple your paper up. Open it back up carefully. Flatten it against your desk. Crumple it again, repeat the crumpling procedure until your paper has a rough looking (buffalo hide) texture.
6. Use your pencil to lightly draw your design. After you have penciled your design and you are happy with it, use tempera paint to add color to your design.
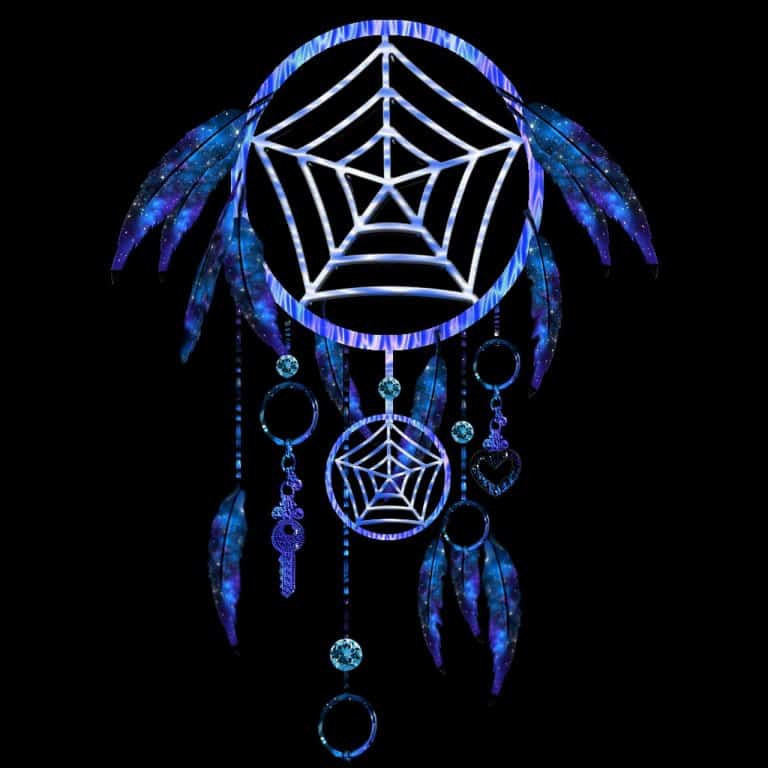
Fifth Grade – Make Your Own Dream Catcher
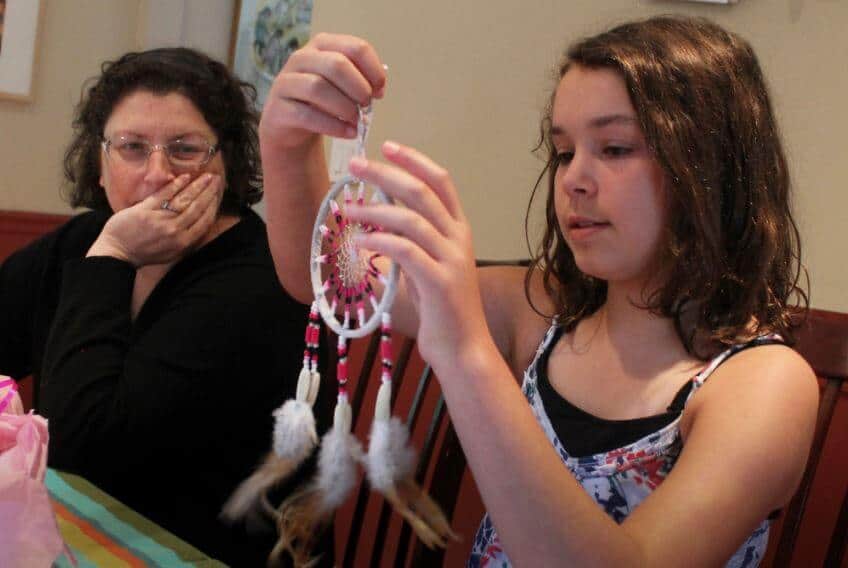
Legends passed down through generations of Native Americans claim that the Dream Catcher is able to allow good dreams to pass through, and it entangles bad dreams in the web. This is one of my all time favorite projects, and sometimes I make them just for fun. You will love having your own dream catcher to hang above your bed.
Materials
- A craft hoop or ring that is 5” in diameter
- 4 yards of string (your favorite color)
- Pony beads (whatever will go great with your string)
- Craft feathers
- Craft glue
- Scissors
Directions
- Cut a length of string that is about 70 inches. Tie one end of the string to the ring. Click here to view the printable pattern.
- Begin tying half hitches around your craft hoop. Make sure that you are pulling the string taught between each of your loops. When you reach the middle, tie off the string and trim excess string.
- Cut an additional 7 inch length of string. Tie it to the bottom of the ring. Slide 3 of your chosen pony beads onto the strings.
- Use a small amount of glue to attach two feathers beneath the beads. Cut two more 7 inch lengths of string and attach repeat the tying and beading process above. Attach your feathers.
- Cut a 4 inch length of string and make a loop to tie to the top of your dream catcher. This will be how you hang it above your bed.


Leave a Reply